Using brushes
Brushes are graphics objects that describe how 2D content is drawn. For example, with brushes you can define the color of text in a Text Block 2D node, fill a background of a 2D node with an image pattern, or apply a material effect of 2D content.
Usually 2D components have a foreground and a background. With brushes you can change the appearance of both. In Kanzi you can use these brushes:
Kanzi Studio stores brushes in the Library > Materials and Textures > Brushes.
Creating color brushes
Use a Color Brush to fill 2D content with a solid color.
To create and use a color brush:
- In the Library press Alt and right-click Materials and Textures and select Color Brush.
- In the Properties set the Brush Color property to the color you want to use to paint the background of a 2D node.
- In the Project select the 2D node the background of which you want to paint with that brush, in the Properties click
 , add the Background Brush property, and select the brush you created in the first step.
- (Optional) To quickly edit a brush, next to the Background Brush or Foreground Brush property click
 and edit the brush.
Creating texture brushes
Use a Texture Brush to fill a 2D area with a texture.
To create and use a texture brush:
- In the Library press Alt and right-click Materials and Textures and select Texture Brush.
- In the Properties set the Brush Texture property to the texture you want to use to paint the background of a 2D node.
- In the Project select the 2D node the background of which you want to paint with that brush, in the Properties click , add the Background Brush property, and select the brush you created in the first step.
- (Optional) To quickly edit a brush, next to the Background Brush or Foreground Brush property click and edit the brush.
Creating material brushes
Use a Material Brush to apply a material to 2D content.
To create and use a material brush:
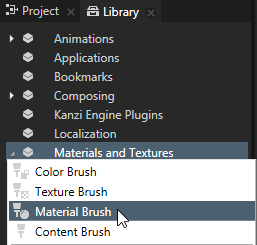
- In the Library press Alt and right-click Materials and Textures and select Material Brush.
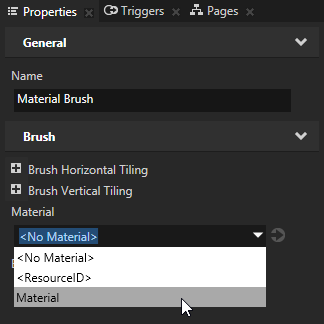
- In the Properties set the Material property to the material you want to use to paint the background of a 2D node.
If you do not have any materials in your project, create a material. See Using materials.
- In the Project select the 2D node the background of which you want to paint with that brush, in the Properties click , add the Background Brush property, and select the brush you created in the first step.
- (Optional) To quickly edit a brush, next to the Background Brush or Foreground Brush property click and edit the brush.
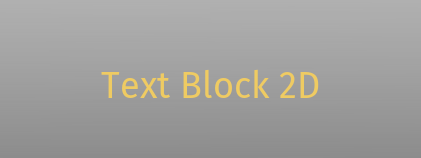
Setting the color of text in a Text Block 2D node
To set the color of text in a Text Block 2D node:
- In the Project create or select a Text Block 2D node.

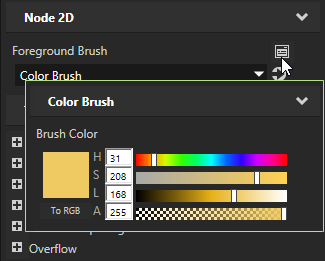
- In the Properties add the Foreground Brush property.

- Set the Foreground Brush property to an existing Color Brush or select <Create color brush...>, click next to the property, and set the color of the Color Brush you created.
Setting the background of a 2D node
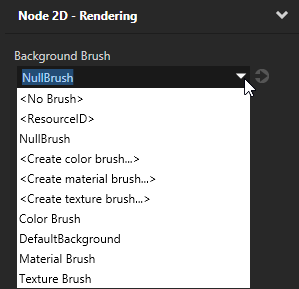
Use brushes to set the background of 2D nodes. In Kanzi all 2D nodes by default have transparent background.
To set the background:
- Create a Color Brush, a Texture Brush, or a Material Brush. See Using brushes.

- In the Project select the 2D node the background of which you want to paint.
Note that you can set only the background of 2D nodes.
- In the Properties click , add the Background Brush property, and select the brush you created in the first step.
Applying custom rendering to 2D nodes
To apply custom rendering to a 2D node:
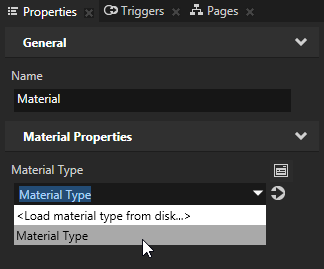
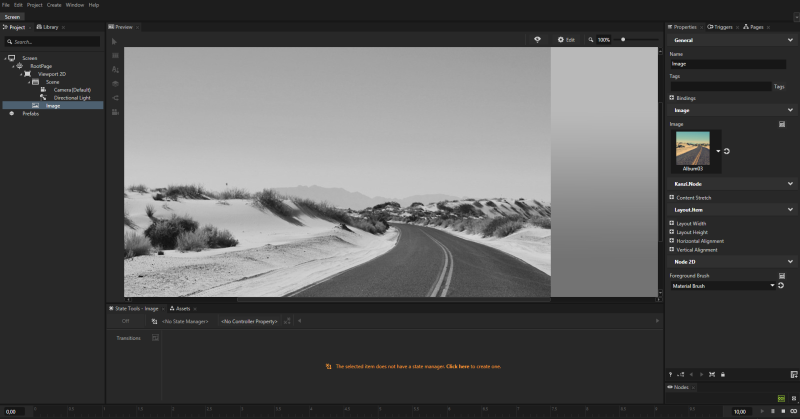
- Create a Material Type that defines the material with which you want to apply to a material. For example, to create a Material Type that converts color to grayscale:
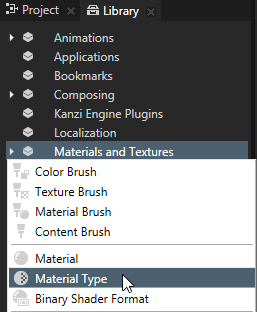
- In the Library press Alt and right-click Materials and Textures and select Material Types.
- In the Library > Materials and Textures expand the material type you created, open the Vertex Shader, replace the existing shader code with this code, and save the shader.
attribute vec3 kzPosition;
attribute vec2 kzTextureCoordinate0;
uniform highp mat4 kzProjectionCameraWorldMatrix;

varying mediump vec2 vTexCoord;

void main()
{
	precision mediump float;
	vTexCoord = kzTextureCoordinate0;
	gl_Position = kzProjectionCameraWorldMatrix * vec4(kzPosition.xyz, 1.0);
} - Open the Fragment Shader, replace the existing shader code with this code, and save the shader.
uniform sampler2D ContentTexture;
varying mediump vec2 vTexCoord;

void main()
{
	precision mediump float;
	// Use this algorithm to convert the colors in the texture used by
	// the Image node to grayscale.
	float grayscale = dot(texture2D(ContentTexture, vTexCoord).rgb, vec3(0.21, 0.72, 0.07));
	gl_FragColor = vec4(grayscale, grayscale, grayscale, 1.0);
}
- Create a material and set it to use the material type you created in the previous step:
- In the Library press Alt and right-click Materials and Textures and select Material.
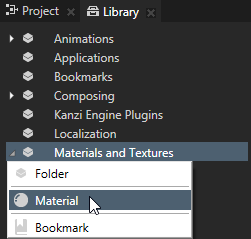
- In the Properties set the Material Type property to the material type you created in the previous step.
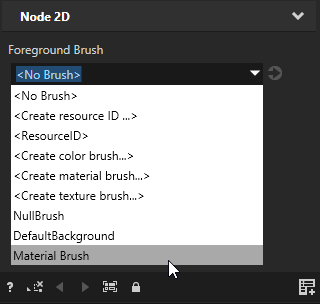
- In the Library press Alt and right-click Materials and Textures, select Material Brush, and set it to use the material you created in the previous step.
- In the Project create or select the 2D node to which you want to apply the material you created.
For example, create an Image node and set it to display an image.
- In the Properties add and set the Foreground Brush property of the node to the material brush that uses the material you want to apply to that node.
See also
Textures
Material types and materials

Open topic with navigation